thumb jam
|
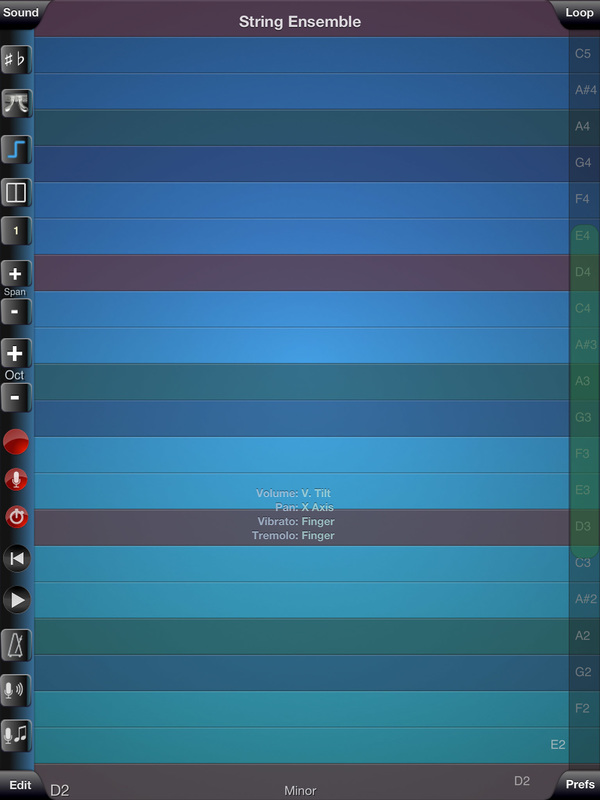
Thumb Jam is one of the most complex apps I have worked in so far in this class, but in good way. There are so many options to chose from. Unlike Garage Band, Thumb Jam is all set up on one basic page. This page has all the notes or strings layed out on this main page. Here you can change octaves up or down, you can choose how many notes are shown at one time. You can choose the key you are paying in.
This is where it gets tricky. You have four tabs in each corner: Loop, Prefs, Edit, and Sound. You will be spending a lot of your time in Loop. Here you can choose to record your loop, pause or play it. You can also choose to clear all loops you've recorded or to delete your last one.You can also change your beats per minute in this tab. The Prefs tab controls audio options, and imports and exports. Here you can chose to save your loop to audio share, sound cloud, or other apps. The edit menu has effects, controls, and samples in it. It also has a save preset option and you can change the name of your project. The sound tab may be the most important. This is where you can choose from the many instruments that are available. You can also adjust the scale, and volume. You can also create an instrument. Creating an instrument just means recording something from the microphone of the iPad and it saves it directly to Thumb Jam. |
|
Project 1
|
I used 4 basic instruments for this project: Bass Plucked, Tenor Sax, SquarePhasing, and Drums. My favorite instrument to work with was the drums, I actually used two lops of the drums and one of everything else. With all the instruments except the drums the notes are set up in little bars like shown above in the picture. You can click on multiple or just one and it will play and hold out the note for as long as you are holding it down. The drums are set up much differently. It is split into 16 squares and each part of the drum takes up one square. All the basic parts that you can play on a normal drum set are all represented here.
| ||
